I Dip, And Dip, Re-Dip: My Journey into Indigo Dyeing


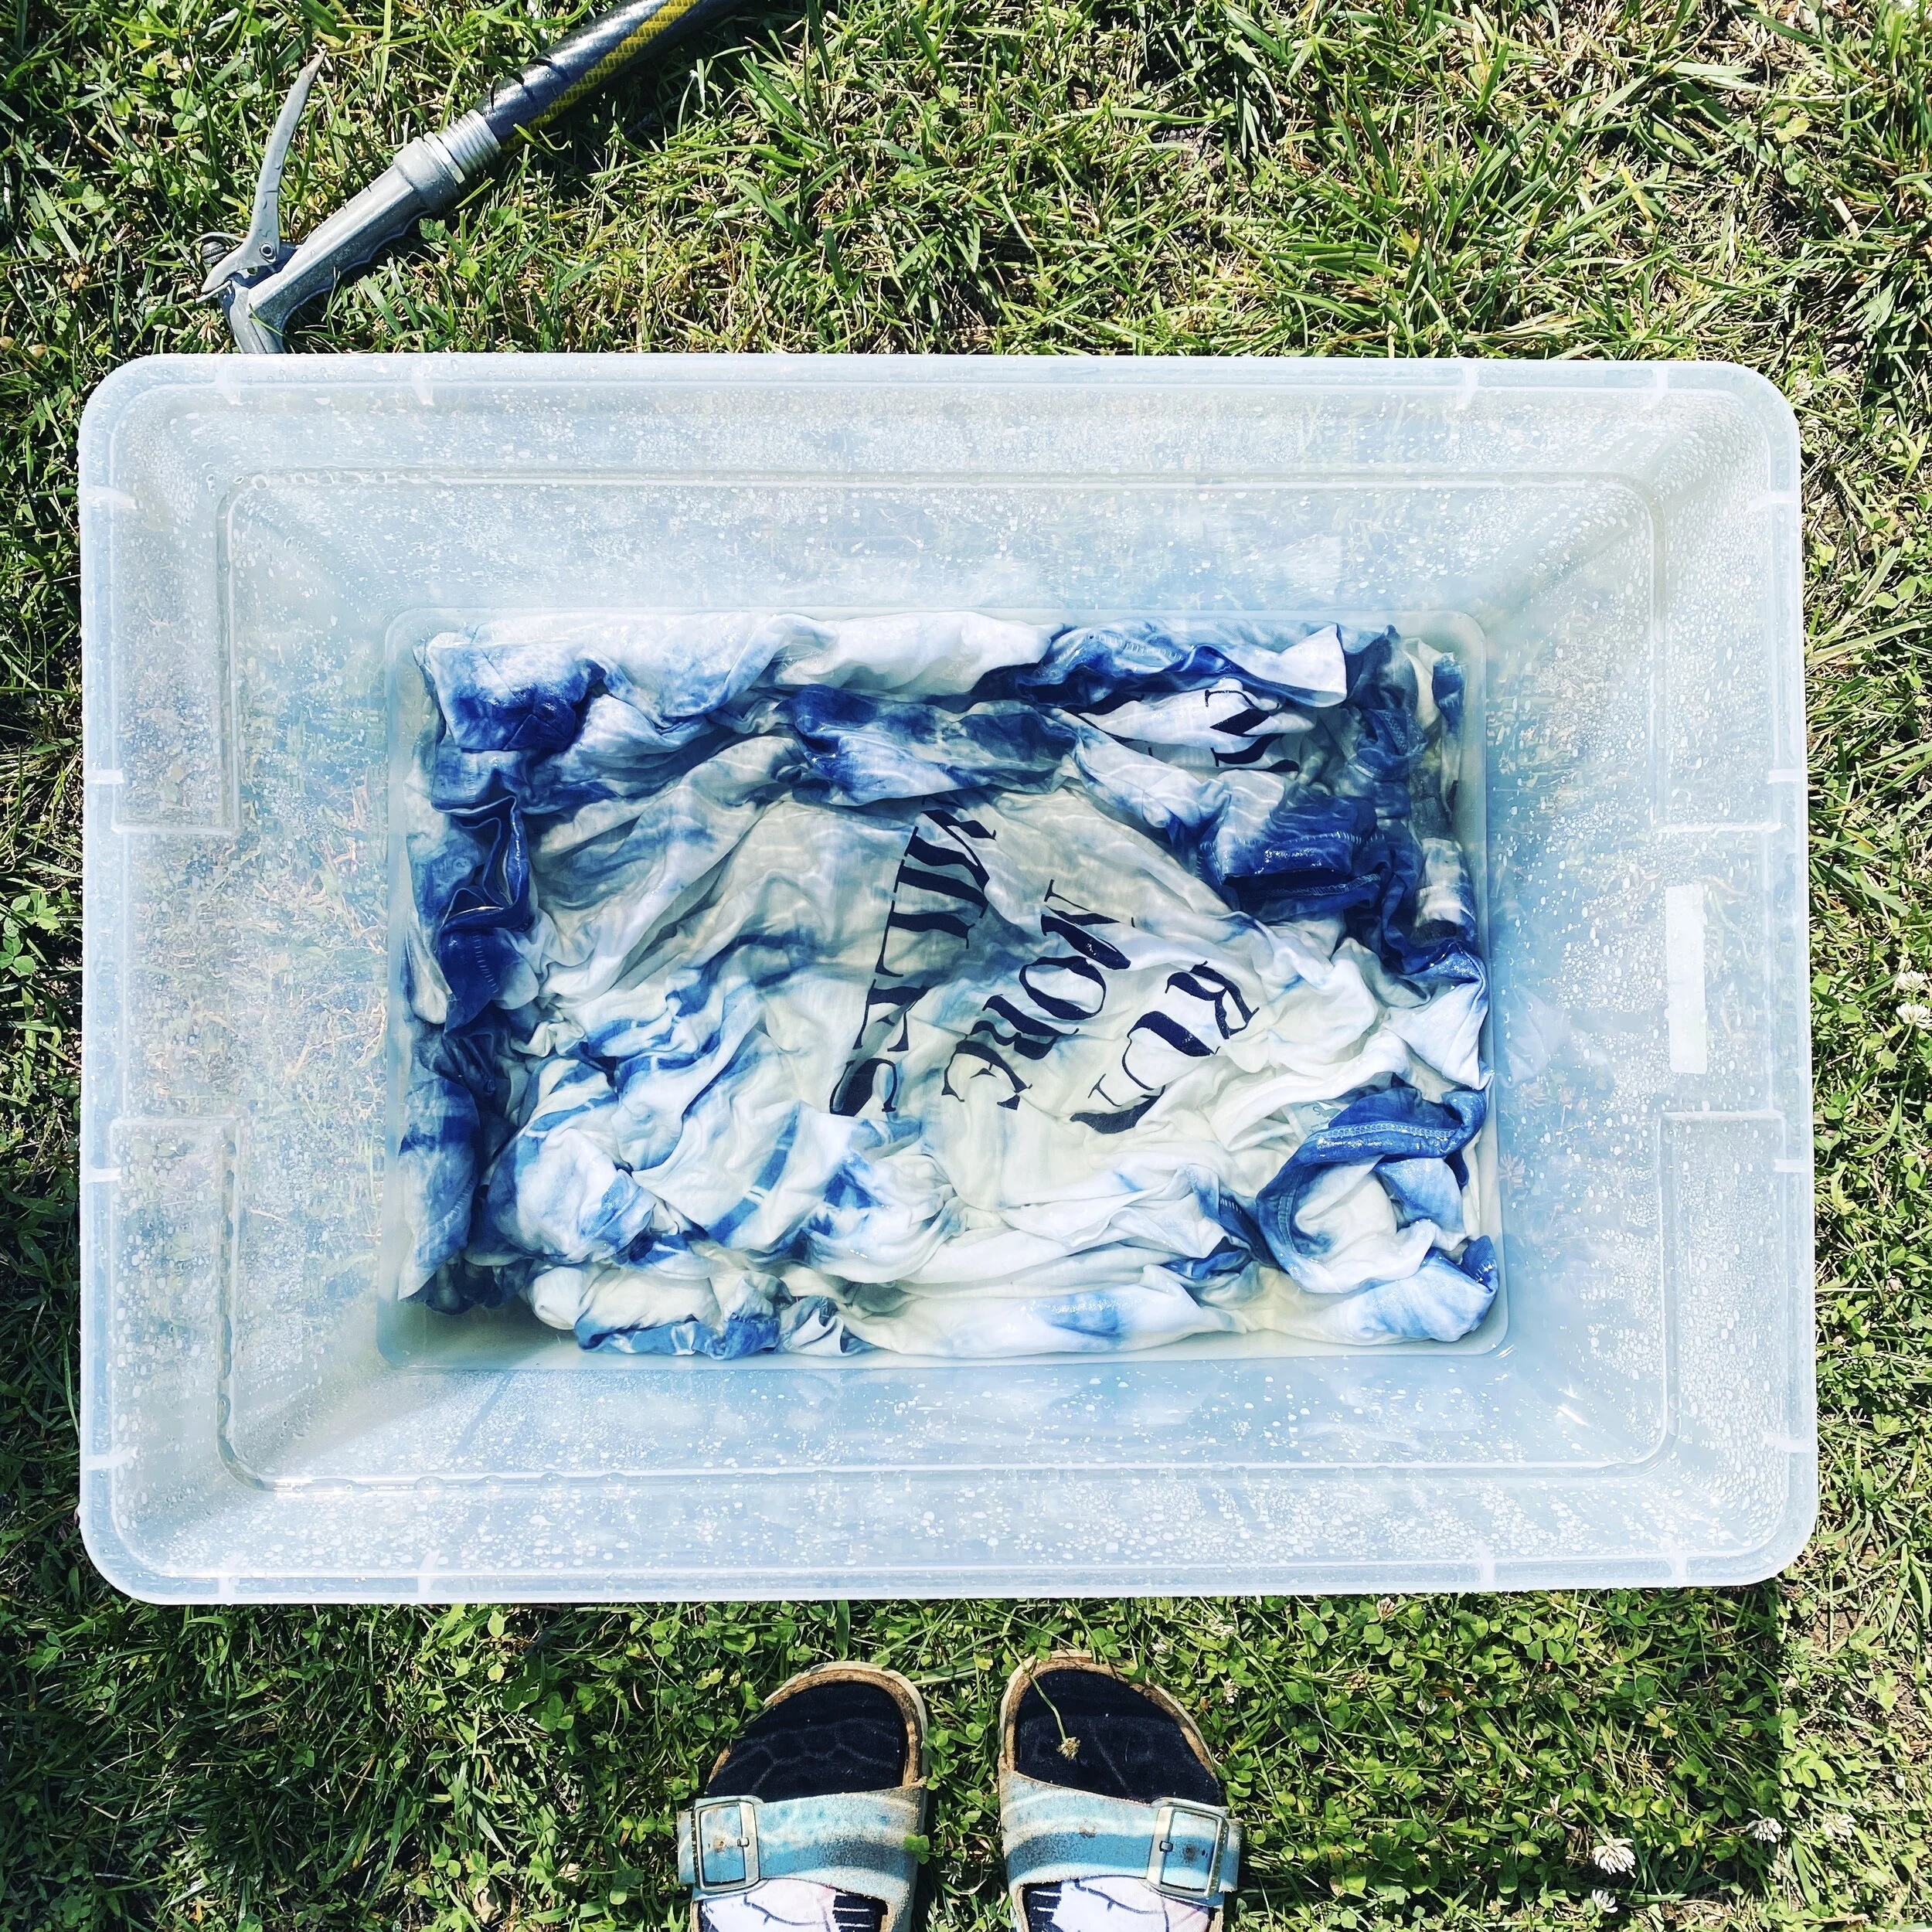
Don’t be fooled: these aren’t done just yet! Here the tees soak in their vinegar bath before the final rinse.
When I first started writing this blog post—before actually the dyeing process for my first round of tees—I had initially begun writing here by saying how much I have always loved tie-dye my entire life, even from the time I was a little girl. Before I even begin to trace my own “history” with tie-dye though, let me add this at the very start: the process of indigo dyeing is a Labor of Love (caps needed). Indigo-dyeing ain’t your backyard birthday party tie-dye!
As I stood in my guest bathroom this week with a tub full of indigo tees which I was proceeding to rinse by hand after they had been dunked in a vinegar bath….after they had been dipped over successive days in a vat which I had been extremely careful to not oxygenate….after I had pre-washed these tees, tied them, and dampened them before they went into the dye for their first of many dunks (“dunk” feels almost sacrilegious as a word choice here)….as I stood there in my guest bathroom, rinsing these nearly complete tees—as this is before their final FINAL wash—I proceeded to accidentally bump the water flow from the tub faucet to the shower immediately over my head, and at that point I thought to myself “wow, this really is quite labor intensive!”
Despite my still blue nails however, I would do it again. I really have always admired tie-dye from the time I was a child—and never the rainbow spiral tees with cheesy graphics which always felt mass produced to even my 10 year old taste, but the more high end looking one-color tie-dyes that were simply blue and white or red and white for example. (One of my all-time favorite shirts from when I was little was a red and white tie-dye shirt from Gap Kids. It was an awesome, beautiful shirt that I basically wore out.) These sorts of tie-dyes, of just one or two colors of dye, feel more sophisticated and nuanced. Instead of screaming camp, they suggest a blend of sophistication and fun, of the joy of being one-of-a-kind and more specifically of being colorful in a unique way. Rather than being loud, they are simply pretty and fashion-forward and happy.
If it already sounds to you like I am talking about tie-dye in elevated terms, you have not read the many, many blog posts that I read that were devoted to natural dyes. These were fantastic in their ferocious enthusiasm if they were sometimes roundabout in their step-by-step descriptions. As I lamented to my friend Ali on our runs together over this multi-day process: “I just want someone to tell me to do step 1, then step 2, and then step 3!” Tending to a backyard vat is almost equal parts precision as it is art as I found—but I still wanted someone to tell me what to do in clear terms so I could solely consider the art side of it without worrying about whether this dye was actually adhering to my fabric or not (is “adhere” even the correct verb here? Natural dyeing has its own proper vocabulary!). As I went down the amazing internet rabbit hole that is the world of natural dyes, I read so, so many recommendations and tips. Amongst my favorite were the advice to use soymilk—but it has to be homemade!—for the final rinse to seal in the indigo color, and how this artist Graham Keegan delightfully introduces the reader to the Vat as he does here. I am going to just quote him, because this is 100% worth not paraphrasing and reading in full:
Keegan and others do a brilliant job of explaining the science behind the entire indigo dyeing process. (Also, how can one ever top the phrase “eschews inertness”?) Throughout this adventure, I actually kept wondering to myself why more science classes don’t have dyeing projects! It’s really just chemistry!


I had wanted to do this project for a while since: A. Runners Love Yoga made tie-dye tees last summer which I’ve had multiple requests to restock and I want people to be happy, B. I’ve been interested in natural dye for a while, C. I’ve actually been growing indigo in my backyard for the past 3 years. I 100% bought the indigo I used for this project, but eventually I’m going to figure out how to harvest my indigo I have right outside my backdoor too! If you are attempting to embark on your own indigo journey, or are just interested in the process, I recommend reading around a lot online to get a sense for how this works. Here also is what I did and how I understand the whole process to work in overly simple layman’s terms:

Giving the Vat some initial stirs before letting the mixture sit for 24 hours before dyeing begins! Note I did this part fresh off a long run!
You have to start with natural fibers like cotton (in other words, polyester, rayon, OR blends containing those or like materials are no-goes as the dye won’t take or will bleed like crazy afterwards. In fact, my husband tried to dye some socks and I got very defensive of my Vat when he put those synthetic fibers in there!)
Pre-wash the tees or fabric or yarn. Evidently this helps prep the tees to “take” the dye as some tees are coated with something that will prevent dyes from sticking. You can wash the tees as a substitute for scouring them (contradictory info out there on this point, but I had success with just pre-washing them).
You have to put only wet fabric in the vat! No dry tees! Throroughly wet the tee, then wring it out and eliminate excess water (which could oxygenate the vat). The wringing/pressing also eliminates air bubbles which, you guessed it, could also oxygenate the vat.
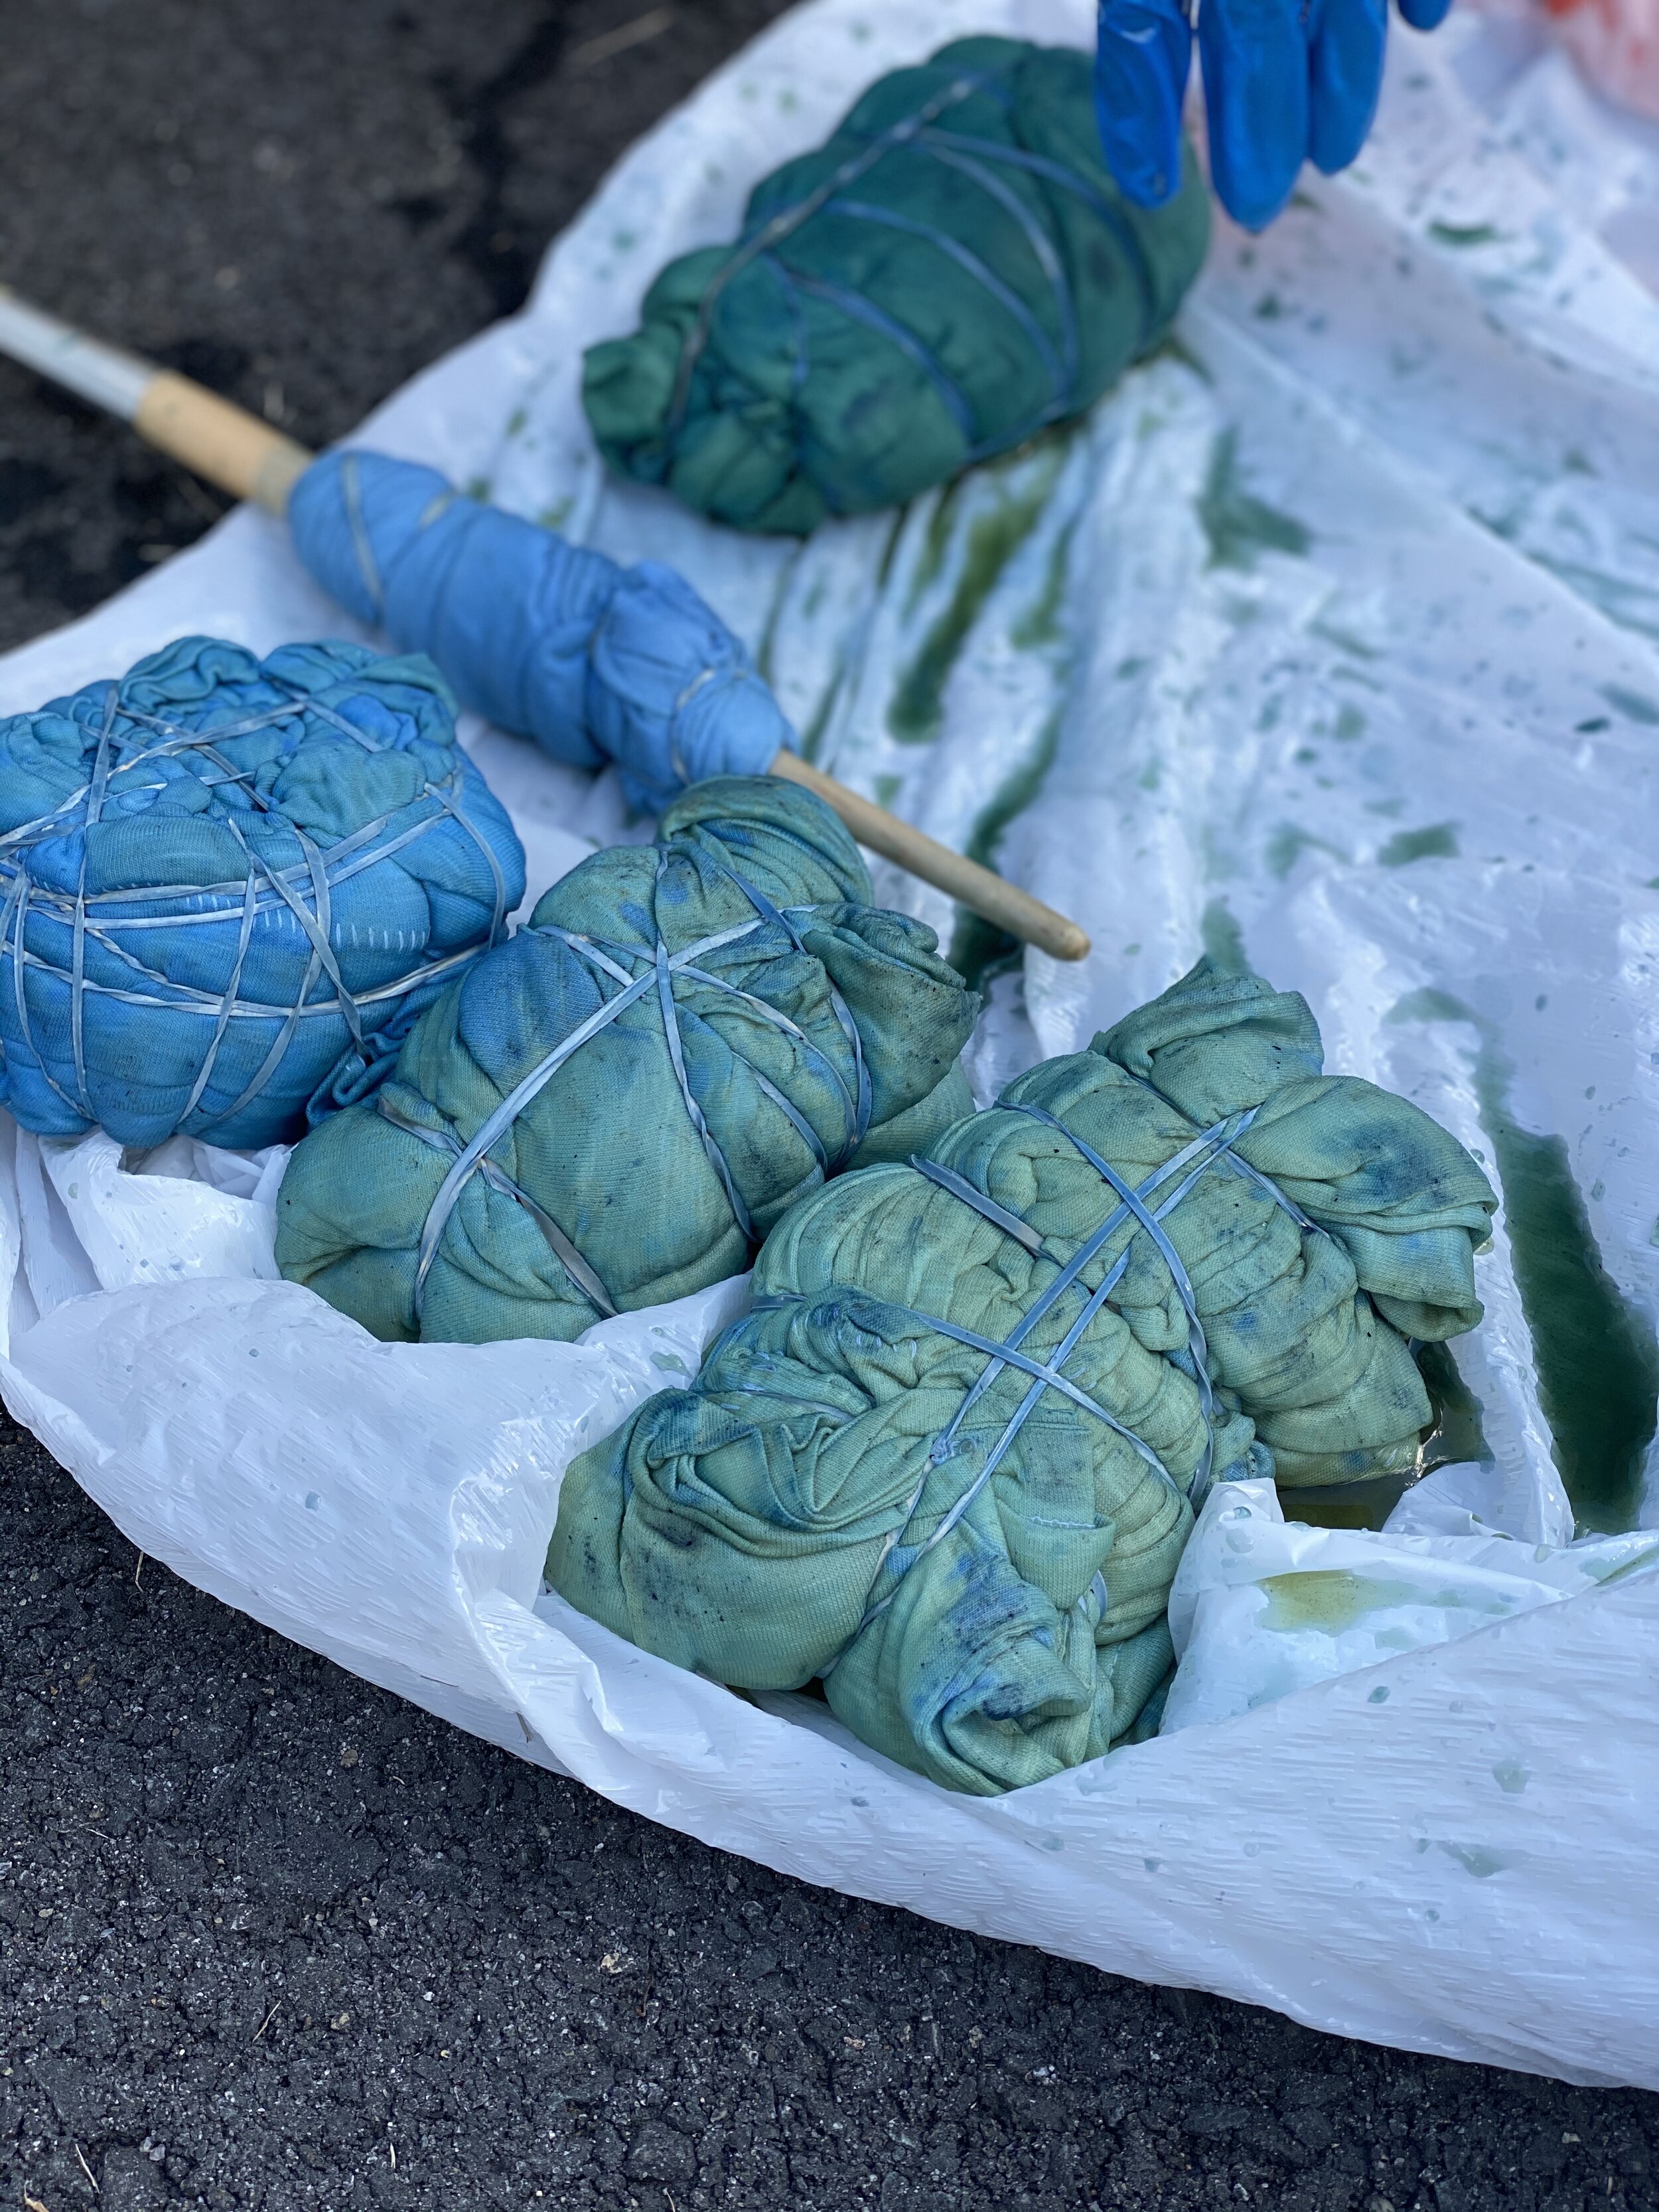
You almost can’t go wrong with how you tie-dye your shirt. As I learned, anything that keeps the dye away from an area of the fabric is called a “resist”—this can be something as simple, and probably is something as simple as a rubber band or even a binder clip. I used only rubber bands and did everything from the “grab the center of the shirt and twist” for a traditional tie-dye swirl effect, to randomly folding in triangles and twisting and then binding, to folding the entire shirt accordion style (sort of like Itajime style shibori without the flat pieces of board to hold the shirt together).
Keep the vat covered when not in use. I also kept it covered while I was dyeing shirts.
Slide the tee down the inside of the bucket to get beneath the film on the top. Put the tee in there SLOWLY. No splashing and through as small of a “hole” in the surface as possible. You want to try to not disturb that top film (basically the oxygenated stuff that has risen to the surface) as much as possible. Instead you work under the film. If your tee initially floats, hold it under there until it sinks, or take it back out slowly and pressing the water out of it again until it is more of a solid wet mass and not a potential floater. Side note: I found that the tighter I wrapped my tees initially, the less likely they were to even try to float.
Similarly, when removing garments, wring them out underneath the film while still in the vat, and then gently slide them back up the side of the bucket. Again, focus on being smooth and no splish splashing around or dripping!!
You are going to need some gloves. For real. I could get away with short rubber gloves for inserting the pieces into the vat, but when removing them, I ended up going past my wrist (thus getting solution inside my glove) to retrieve everything. If this is also you, try wrapping the end of a garbage bag around your hand and up your arm for retrieval. It is harder to control than a glove, but it was a good solution in a pinch as I didn’t have any longer to-the-elbow rubber gloves. To remove any indigo that gets on your hands, try rubbing alcohol. If it gets on your nails, good luck as mine are still blue several vigorous scrubs and after approximately 6 hours in a swimming pool!
Timing: I left the pieces in the vat for anywhere from 5 min. to an hour for the dips. Longer is really not better—you just need to leave them in there long enough for the dye to adhere. When you pull a piece out, it should be green or have a greenish tint over top the existing blue (if not the first dip). This greenish tint means the dye is working! Once the piece is exposed to air long enough, it will be completely blue (no green). You can either oxygenate through exposure to air OR run it under cold water. I occasionally did the latter but nearly always stuck with the former as I felt like putting it in water was riskier in terms of being drippy/splashy/introducing oxygen back into the vat on a successive dip. Similarly with the timing out of the vat, my understanding is longer is not really better but that you just need time for the piece to fully oxygenate (turn blue). Sometimes I did half a day for this part, sometimes I did 20 minutes!
Even if your pieces are looking really dark, KEEP DIPPING. That is going to lighten up a lot! My husband kept trying to tell me everything was done and I was like “these need at least 3 more dips!”
After your pieces are done (at least with the dipping phase) is almost the most confusing part in terms of what I read online—lots of sometimes conflicting recommendations there. What I ended up doing is: letting everything oxygenate through air exposure for 24 hours before the final rinse. Before the final rinse, make a vinegar bath (ratio: 1 tablespoon of vinegar to 1 L of water) and let everything soak in there for an hour. Swish everything around a bit before letting it soak to make sure the fabric gets thoroughly wet. Then, rinse and rinse and rinse with fresh water until you eliminate all excess dye (try to not turn the shower on yourself like I did if you’re working from your tub).
Tips on where to work for the post-dip process: If you are working in your bath tub, be sure to clean your tub right after so it doesn’t get stained blue! Along the way for this whole post-dip process, you will likely find that it is easier if you do the vinegar baths and initial hose-off outside (I actually 100% would not do this inside and it would be a disastrous mess—you are now allowed to be splashy since you aren’t working with the vat!) I also found it immensely helpful to have a couple big plastic bins (I have these on hand all the time anyhow for clothing storage) for the vinegar bath, an initial post-vinegar bath rinse-off, and to transport everything into my house at last for the final (phew!!) rinse-off in my bathtub.
After the bathtub rinse, now you are safe to actually wash everything. Obviously, to be on the safe side, you should not wash your indigo tees for the first several washes with any other garments. Then, give yourself a very big pat on the back because you made it to the end!
Hope you enjoyed reading about my foray into indigo dyeing! Best of luck if you also try this at home! And if you’d rather just enjoy the fruits of my labor, you can also find tees and tanks in the shop here!